Rendering or making lard is the process of melting out the impurities found in pig fat in its natural state. After straining out the impurities, you are left with lard that is packed with nutrients and useful for several things.

While making your own lard may seem like a cumbersome task, it is actually quite simple and an excellent way to ensure you have high quality, nutrient dense lard that you can use for cooking, baking, and much more. All you need is a crock pot or stock pot and a cheesecloth (or an improvisation for a cheesecloth) and you will have a healthy cooking fat to use in all sorts of dishes!
What is Lard?
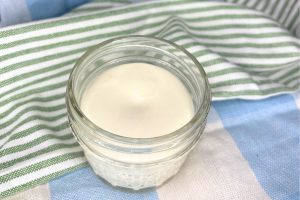
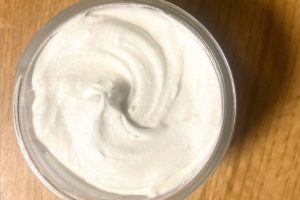
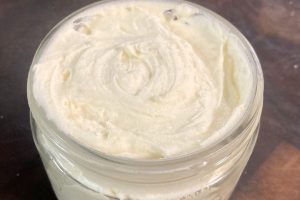
Lard is the fat from a pig that is rendered or melted and the impurities removed. Lard from pastured pigs is white and a neutral mild flavor that makes it great for everything from cooking to baking. At room temperature it has a consistency similar to room temperature butter which makes it great for spreading and using in a variety of ways.
Rendered beef, sheep, bison, or deer fat is called tallow.
Rendered chicken fat is called schmaltz.
Rendered butter is called ghee.
Lard has had a variety of uses for centuries, but has primarily been replaced by hydrogenated oils and synthetic products during recent years as we have come to fear the use of saturated fats in cooking and baking.
Different Types of Lard
There are two different types of lard: fatback lard and leaf fat lard.
Fatback Lard
Fatback lard is the fat between the muscles of the pig and the layer of skin. This is also known as subcutaneous fat. The lard from this portion of the pig tends to be a little less smooth than the alternative. It also tends to have a more porky smell and flavor to it. Still this is great for cooking things like meat and eggs or savory dishes.
Leaf Lard
Leaf lard, on the other hand, is the soft visceral fat around the kidneys and loin within the abdominal cavity. This is considered the highest quality of lard. When rendered it is a soft, spreadable that is extremely clean in nature. This is what gives it a neutral flavor and makes it great for baking.
How To Find The Best Pig Fat?
When working with lard it is especially important to get the highest quality possible. Traditionally raised pigs are often fed corn and soy that has been sprayed with glyphosate. The corn and soy along with the chemicals used changes the fat composition of the pig. The phytoestrogens from the soy and the chemicals used build up in fat of the pig which is then ingested when eating their meat or fat.
Additionally, it is important to ensure that the animal you are getting the lard from is raised well and is handled with care and cleanliness. The best way to do this is to find a local farmer who raises their own pasture-raised pigs and visit the farm. Many of these types of farmers will willingly share exactly how their animals are raised and cared for. Something that is not easy to find in corporate America where businesses cut corners. The Weston A. Price Foundation is a great resource to find local farmers.
Lard Benefits & Uses
What is it that makes lard so special?
Benefits of Lard
Pastured Lard is rendered pig fat. It can be found in stores. However, like many fats and oils in grocery stores today, it is important to check the label for quality as sometimes other oils are mixed into the lard. Like tallow, lard has a high smoke point, meaning it won’t oxidize at high temperatures which can
Did anyone else’s grandma preach about how delicious cooking with lard was? Mine always says how wonderful it is for cooking and especially baking her delicious pies. As it turns out, my grandma was absolutely right!
Lard is the #2 source of vitamin D only second to cod liver oil which is great for building strong bones and fighting seasonal depression. It has a neutral flavor making it great for everything from baking pies and pastries to cooking meats and eggs.
Lard Uses
- Cooking Oil: Great for fries, hamburgers, eggs, veggies, anything you can think of!
- Baking: Lard used to be used heavily for baking because of its neutral flavor. Leaf fat lard in particular has a nice smooth texture and neutral flavor.
- Soaps
- Body Butter Lotion
- Face Lotion: I know it sounds weird to smear pig fat on your face, but it’s actually great!
- Candles
- Conditioning Leather
- Shave cream
How to Render Lard
There are a couple ways to render lard. You can wet render which is done using water or dry render. I stick with dry rendering since it seems simpler to me and there is no need to worry about your lard going rancid from being exposed to water.
What You Will Need:
Quality pig fat
Crockpot or stockpot
Cheesecloth or improvised cheesecloth material (you will need something to strain out fine bits)
1.Start off with the cold fat. It is much easier to handle and cut. Cut up pig fat into small cubes, trimming out any bits of blood, gristle, or meat. If you order your meat in bulk and get a half or whole pig, the processor may even grind up the fat for you making it ready to render without needing to cut it up. Having the pig fat in smaller chunks will help it melt and render more quickly.
2.Add fat chunks to a food processor and process until it is the consistency of ground beef or pork. If you don’t have a food processor, that is okay. Chop up the fat into smaller pieces to help it render more quickly.
3.Place fat in a crockpot for 5-6 hours on the “low” setting. If your crockpot tends to run hot, turn it to the “warm” setting. The alternative to the crockpot is the stove top in a large stock pot. Turn it on a low heat. This method is a little quicker, but it is important to keep an eye on it and stir occasionally to make sure it is not burning. Whichever you choose, make sure to use a very low heat. Too high of heat risks burning the lard giving everything you make with it an unpleasant taste and smell.
4.You will know it is done when there is a clear liquid at the bottom of your pot and little bits of gristle floating on top. Pour through a cheesecloth, straining out the gristle and meat.

5.Pour liquid lard into wide mouth quart jars. Since the lard is smooth and sticky, especially at room temperature, a jar works well for storage. However, I do recommend wide mouth jars as it is easy to dig to the bottom as it runs out.
How To Store Lard
Lard is an extremely shelf stable natural fat. You can store lard at room temperature, for up to six months. In the fridge, it will last for up to a year. If you store the lard in the freezer, it will last multiple years. However, it will start to lose some of its flavor and texture after the first year.
How To Make Lard
Equipment
- 1 Crockpot or Stock Pot
- 1 Cheesecloth or Improvised Cheesecloth
Ingredients
- Raw pig fat from a pasture-raised pig
Instructions
- Start off with the cold fat. It is much easier to handle and cut than when it gets warm. Cut up the pig fat into small cubes trimming out any bits of blood, gristle, or meat. If you order your meat in bulk and get a half or whole pig, the processor may even grind up the fat for you making it ready to render without needing to cut it up. Having the pig fat in smaller chunks will help it melt and render more quickly.
- Add fat chunks to the food processor and process until it is the consistency of ground beef or ground pork. If you don't have a food processor, that is okay. Chop the fat into smaller pieces to help it render more quickly.
- Place fat in a crockpot for 5-6 hours on the "low" setting. If your crockpot tends to run hot, turn it to the "warm" setting as needed. The alternative to the crockpot is the stove top in a large stock pot. Turn it on a low heat. This method is a little quicker, but it is important to keep an eye on it and stir occasionally to make sure it is not burning. Whichever you choose, MAKE SURE TO USE A VERY LOW HEAT. Too high of heat risks burning the lard giving everything you make with it an unpleasant taste and smell.
- You will know it is done when there is a clear liquid at the bottom of your pot and little bits of gristle floating on top. Pour through a cheesecloth, straining out the gristle and meat.
- Pour liquid lard into wide mouth quart jar. Since the lard is smooth and sticky, especially at room temperature, a jar works well for storage. However, I do recommend wide mouth jars as they are easier to dig to the bottom as it runs out.



Leave a Reply